How Event Translate works

Event Translate turns live speech into high-quality translated audio and live transcripts in 35 output languages, with simple setup for operators and listeners.

01 / Planning or operating the event

Getting started

Create an account, connect your audio, and click “Start Translation”.

  1. 1

    Create an account

    Sign up with email or Google. Event Translate creates your event, unique listener link, and QR code automatically.

  2. 2

    Connect your audio

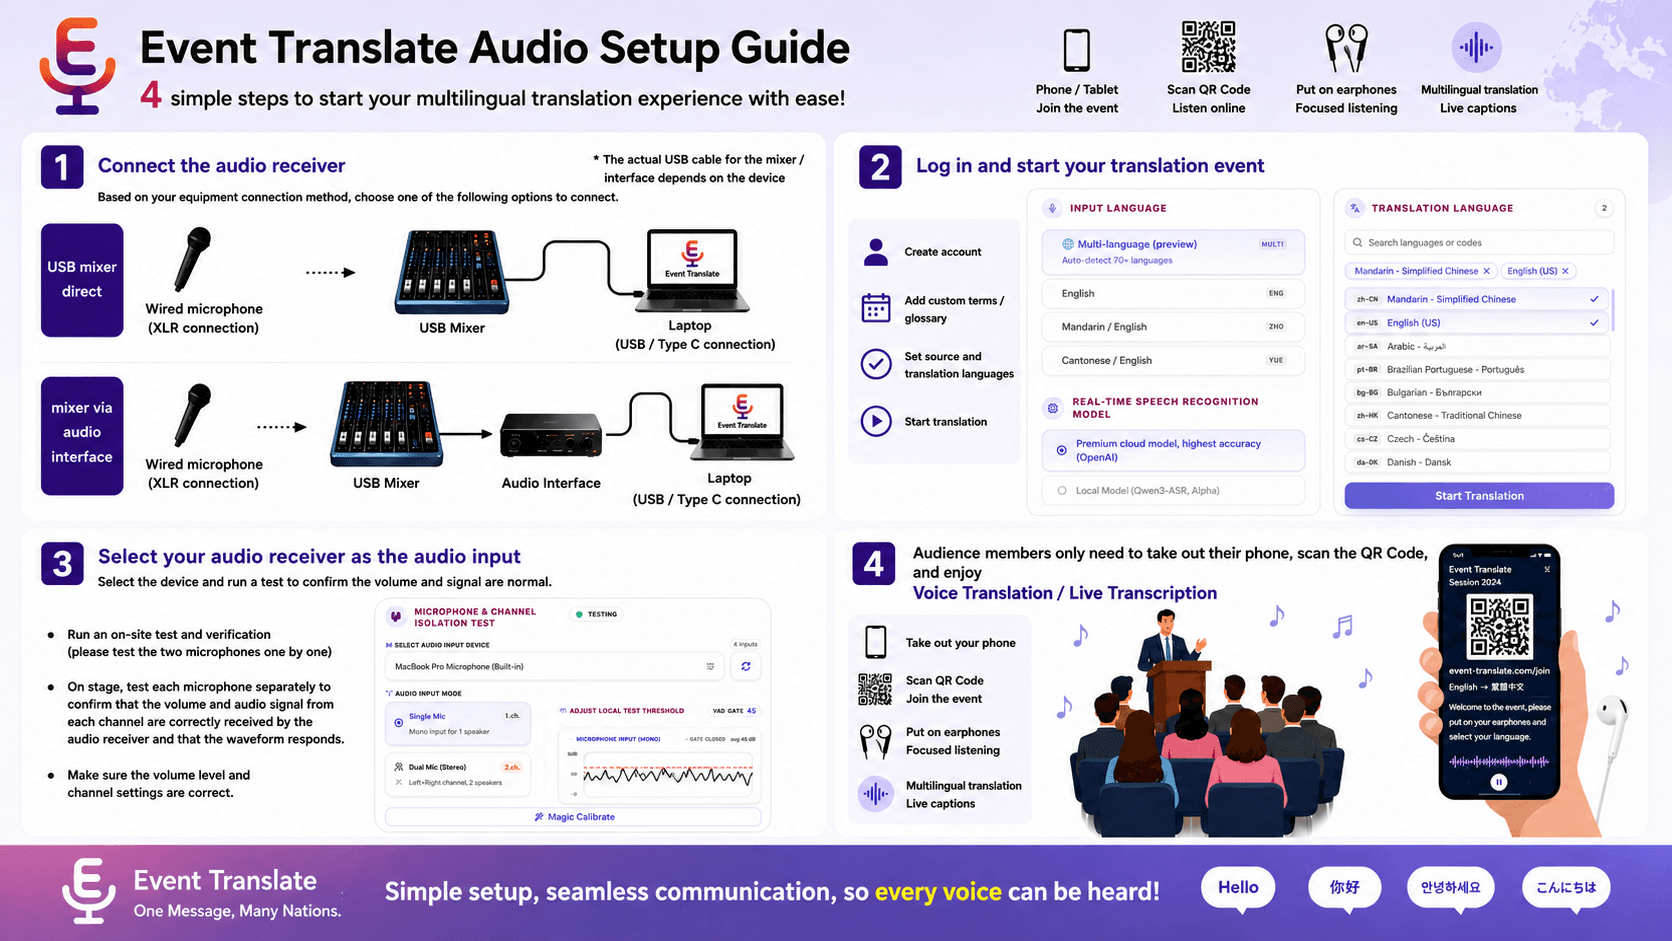
    On the Stage configuration page, select your mixer or audio interface, choose input and output languages, then check the meter while someone speaks.

  3. 3

    Click “Start Translation”

    Start once the meter is moving steadily. The listener page will begin receiving translated audio and transcripts.

Optional customisations

Complete these before the event to match the listener page and terminology to your organisation. Some branding options depend on your plan.

Custom listener URL

Monthly and annual Pro subscribers can choose a branded subdomain, such as ccil.eventranslate.com. The 1,800-credit pack also includes 90 days of custom-domain access.

Listener page branding

Add your organisation logo, listener-page Display Title, event name and theme colours. Listeners see this branding when they open the link and choose a language.

Choose output languages

Choose from 35 output languages on the Stage configuration page. Every translated language includes high-quality audio and a live transcript.

Add glossary terms

In Settings, add company, speaker, and product names, industry terms, abbreviations, or jargon once — with an optional preferred translation for any output language. Finish before the event starts.

02 / How listeners join

How listeners join

Listeners join from their own phone browser. No app installation or account is required.

Audio and transcripts stay together

Event Translate prioritises audio streaming. All 35 output languages provide high-quality audio and a live transcript together.

  1. 1

    Share the QR code or link

    Download the QR code or copy the listener link from the Console, then place it on event screens, table cards, or attendee messages.

  2. 2

    Scan the QR code

    Listeners scan with their phone camera or open the link to go straight to the event listener page.

  3. 3

    Choose a language

    Select from the languages enabled by the operator for this event.

  4. 4

    Listen or read

    Tap play for high-quality translated audio and follow the live transcript at the same time. An iPhone may require one tap before audio starts.

03 / Connecting venue audio

Connecting your audio

Event Translate works in a modern laptop browser. The key is sending a clean, speech-focused signal from the venue into that browser.

The closer the input is to a clean, dry voice signal, with little room reverb or music, the more clearly Event Translate can recognise and translate it.

Recommended: mixer feed

1. Start with the main mix

For most events, the front-of-house or main mix is a practical starting point. Make sure speech is not buried by music or playback.

2. Use an AUX or matrix when available

Build a separate output that keeps presenter microphones prominent and removes unnecessary instruments, background music, and audience microphones.

Fallbacks for tests and simple setups

1. Lapel or clip-on microphone

When there is no mixer, connect a lapel microphone to the laptop. This works for touring speakers or small venues.

2. Place the device close to the speaker

For a test, place a phone or tablet near the lectern. Do not place it in front of a PA speaker or at the back of the room.

Connect the mixer to the laptop

External USB audio interface, recommended

Send an AUX, matrix, or Control Room line output into the interface, then connect the interface to the laptop by USB.

Mixer CARD OUT or USB

If the mixer sends the required mix through CARD OUT or compatible USB audio, connect it directly and select that input in the browser.

Compatible laptop line input

Use only a true line input with the correct cable. Most modern MacBooks need a USB audio interface. Never connect a speaker-level output.

See audio and mixer setup

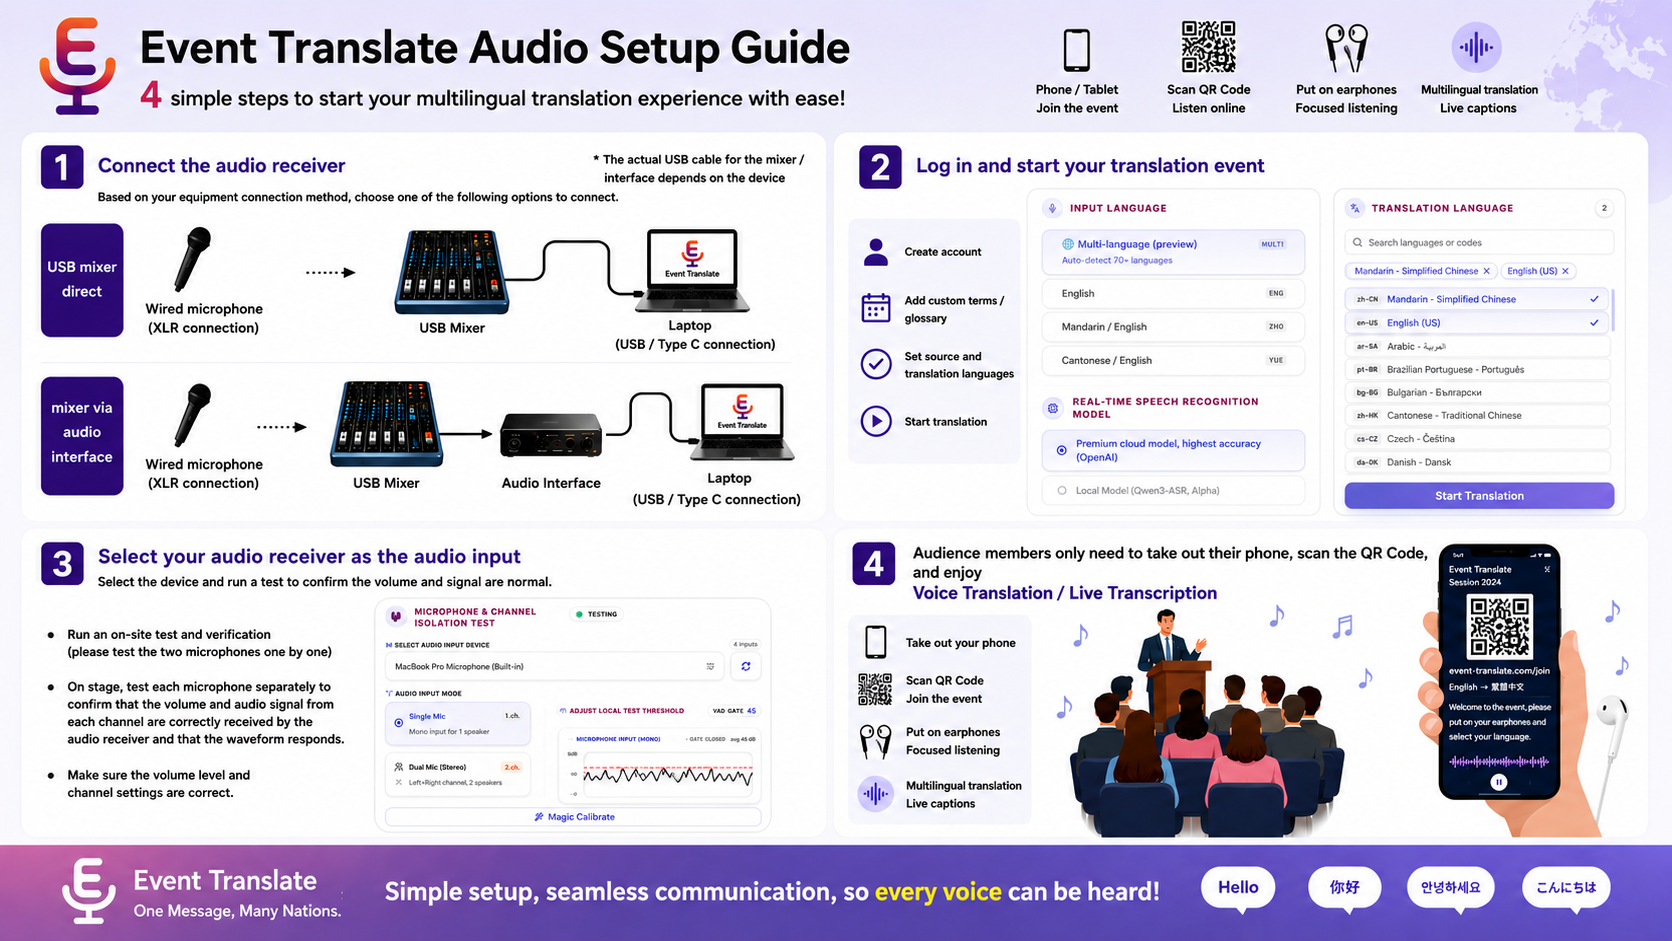
Quick reference image

A one-page wiring summary, available in English, Simplified Chinese and Traditional Chinese, and switched automatically with the page language. Use it for quick reference on site; the written steps here and in the technical guide remain the complete, screen-reader-accessible instructions.

Download the quick reference image
One-page reference for connecting a mixer, USB audio interface and laptop to Event Translate

Frequently asked questions

A laptop running Chrome or Edge, a stable internet connection, and one clean speech feed from the venue mixer. Most rooms put a USB audio interface between the mixer and the laptop; a mixer with its own USB audio or a compatible card output can connect directly. No dedicated server, receiver hardware or headset distribution is required.